1. Configure Bitcoin Payments on the Store Settings Level
a.) Lightning Network Configuration
To make the Lightning Network method available on the checkout page, you need to provide your Lightning Node connection string and save it.
b.) On-Chain Method Configuration
To make the On-Chain Method available on your checkout page, you need to provide your BTC wallet's extended public key and save it on the Store Level.
Important: After specifying your wallet's extended public key and clicking "Connect", the system will ask you to confirm your wallet addresses. These addresses will be used for creating the transactions.
Please double-check that all of the addresses that you’ve provided match your BTC wallet's addresses.
c.) SMTP Server Settings
SMTP Server Settings are required to use Email Rules. These settings will be used to send emails to your customers regarding Bitcoin Payments.
d.) Email Rules
You can choose which events to email your customers about during the checkout process.
The list of available events are:
Invoice Created - The Bitcoin Invoice was created and the Bitcoin payment pop-up appeared to the customer on the checkout page.
Invoice Expired - The created invoice expired (invoices last for 15 minutes).
Invoice Payment Received - A new transaction was created for the customer's Bitcoin invoice.
Invoice Settled - The Bitcoin Invoice was fully paid by the customer.
You can create whatever subject lines and body text that you want for these emails, including using dynamic variables to create customized emails for each customer. For example, your body text could begin with:
“Dear %customer_first_name”
Which would show up to the recipient as, “Dear (their first name)”
Other examples of dynamic variables you could use include:
%customer_last_name
%invoice_id, %invoice_amount
%invoice_currency
%invoice_url
The email body can also contain both HTML and CSS.
2. Bitcoin Payments Appearance on the Checkout Page
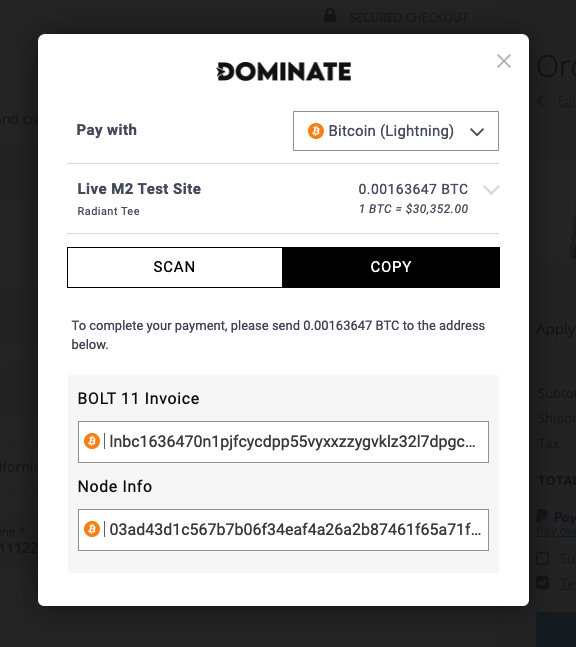
When the customer clicks "Pay with Bitcoin", a new Invoice will be generated for them and a pop-up will appear with all the payment information necessary for creating a transaction and processing their order.
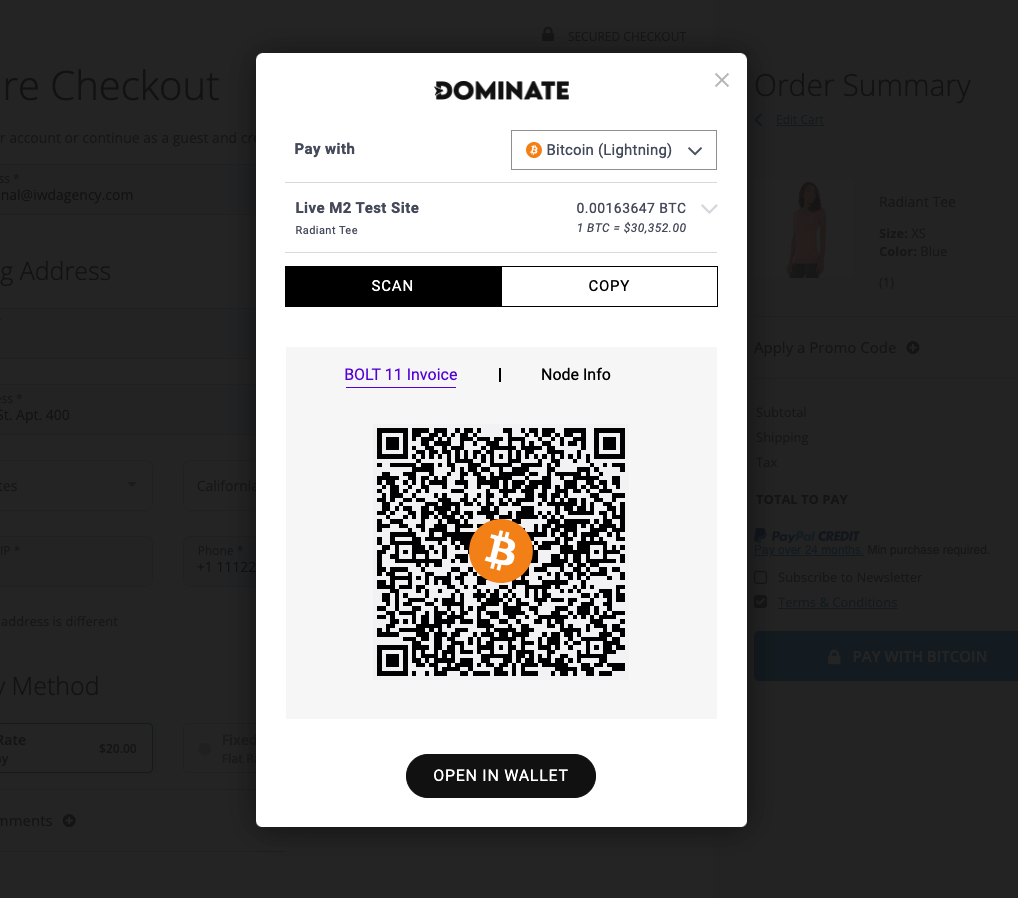
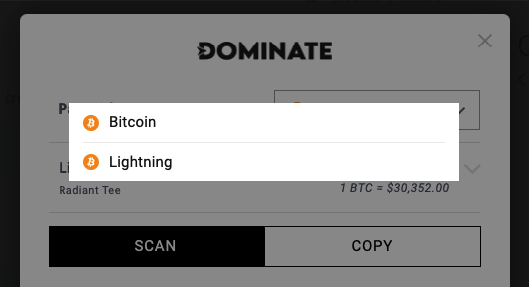
If you configured and enabled both the On-Chain and Lightning Network methods, the customer will be able to choose between them within the pop-up.
To pay for the invoice, the customer can scan the QR code via BTC wallet or copy the merchant’s wallet address/Bolt 11 Invoice address.
A BTC invoice lasts for 15 minutes. When it expires, the customer will receive a notification. They can generate a new invoice by clicking "Pay with Bitcoin" again.
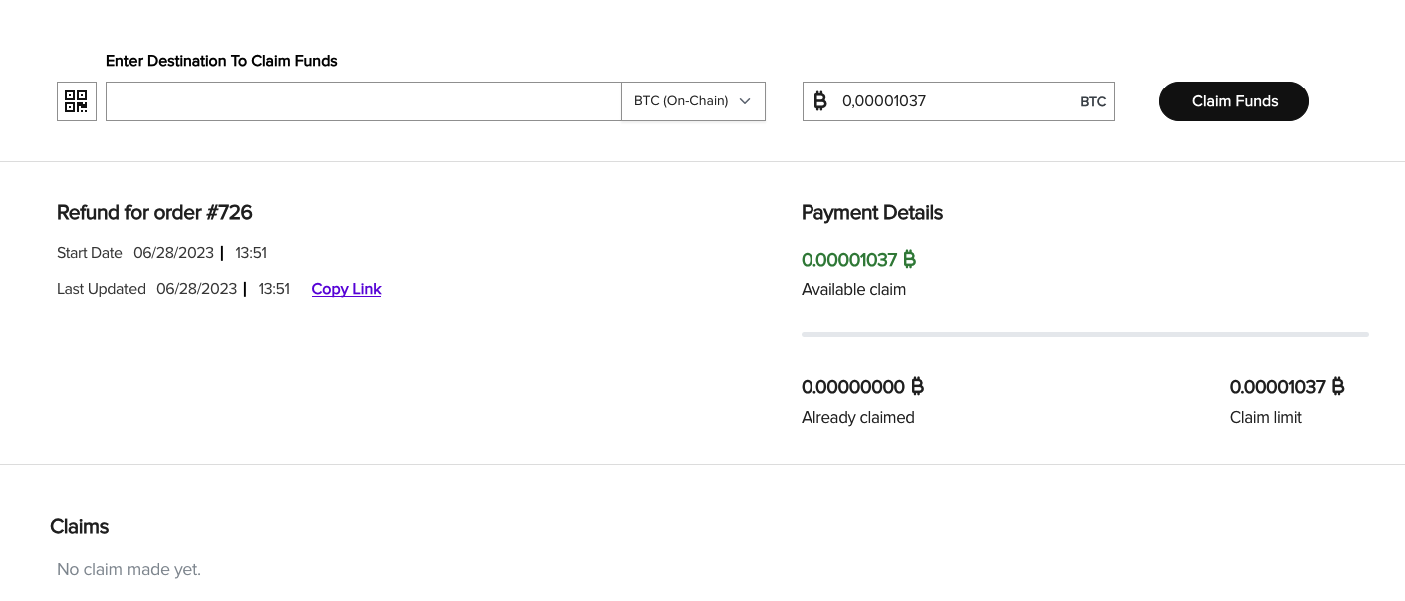
3. Bitcoin Payments Refunds Process

This link will also be shared with your customer through an Order Refund Email.
Your customers will be able to specify their Lightning Invoice or BTC Wallet address where they want funds to be refunded.
Important: Funds will not be automatically refunded to the customer’s address unless your merchant's wallet is a BTC Hot Wallet (always online) or in case your configured Lightning Node doesn't provide the functionality of an automatic payment processor.
After providing a destination address and clicking "Claim Funds", a new Claim will be created with "Awaiting payment" status.
In case the configured BTC wallet is not of a "Hot" type (always online) or your Lightning Node doesn't support automatic payment processors triggered by 3rd party Apps, you can copy the Destination address of your customer on the refund page and manually send the necessary amount of funds via your BTC wallet.