

How to configure a multi-store website using Dominate Hosted Checkout in Magento 2?
Note: Each Dominate Account can be linked only to one PayPal and/or Braintree Account. If your multi-store configuration uses different payment credentials, you will needed to create a Dominate account per store.
The Dominate Hosted Checkout allows you to have a multi-store website configuration in your Magento 2 platform as long as these stores use the same PayPal or Braintree credentials. It is important to note that each Dominate Account can only be linked to one PayPal account.
Some Magento 2 merchants have the business need to have different stores and store views within a single Magento 2 platform. With these settings, each store view can have its domain. Take the following example as a reference:
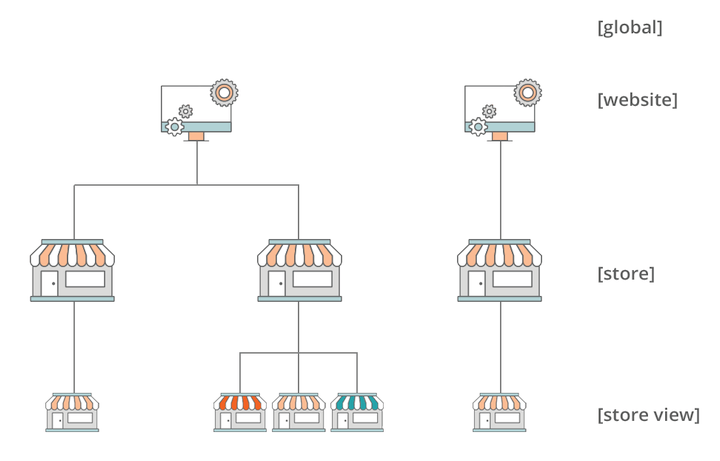
The Dominate Hosted Checkout allows you to have different configurations per store-view, as the Dominate Hosted Checkout settings works on this level.
Important note: Having a multi-website configuration with a single Dominate Account (Api Key and Secret) will create all orders on the default store level.

For you to configure your Dominate Account to use a multi-website configuration, please follow these steps:
- Login to your Dominate account.
- Click on the Stores tab in the upper corner of the header and create as many store-views with different domains as needed -> Pro Plan ( only two stores are avalable for Free Plan). To create a store click Add a new store text link or go to Account tab -> Stores and click on Add new store button.
- Capture the required information and click Add store button:
Store Name: Type your company name. It will help you to identify the Checkout-Page later on.
Store URL: Type your base website URL without the prefix and ending slash. i.e., iwdagency.com Ecommerce platform: Select from the dropdown the best option that fits your business type.
Default Language.
 4. Copy the store API Key and API Secret in the Connection tab:

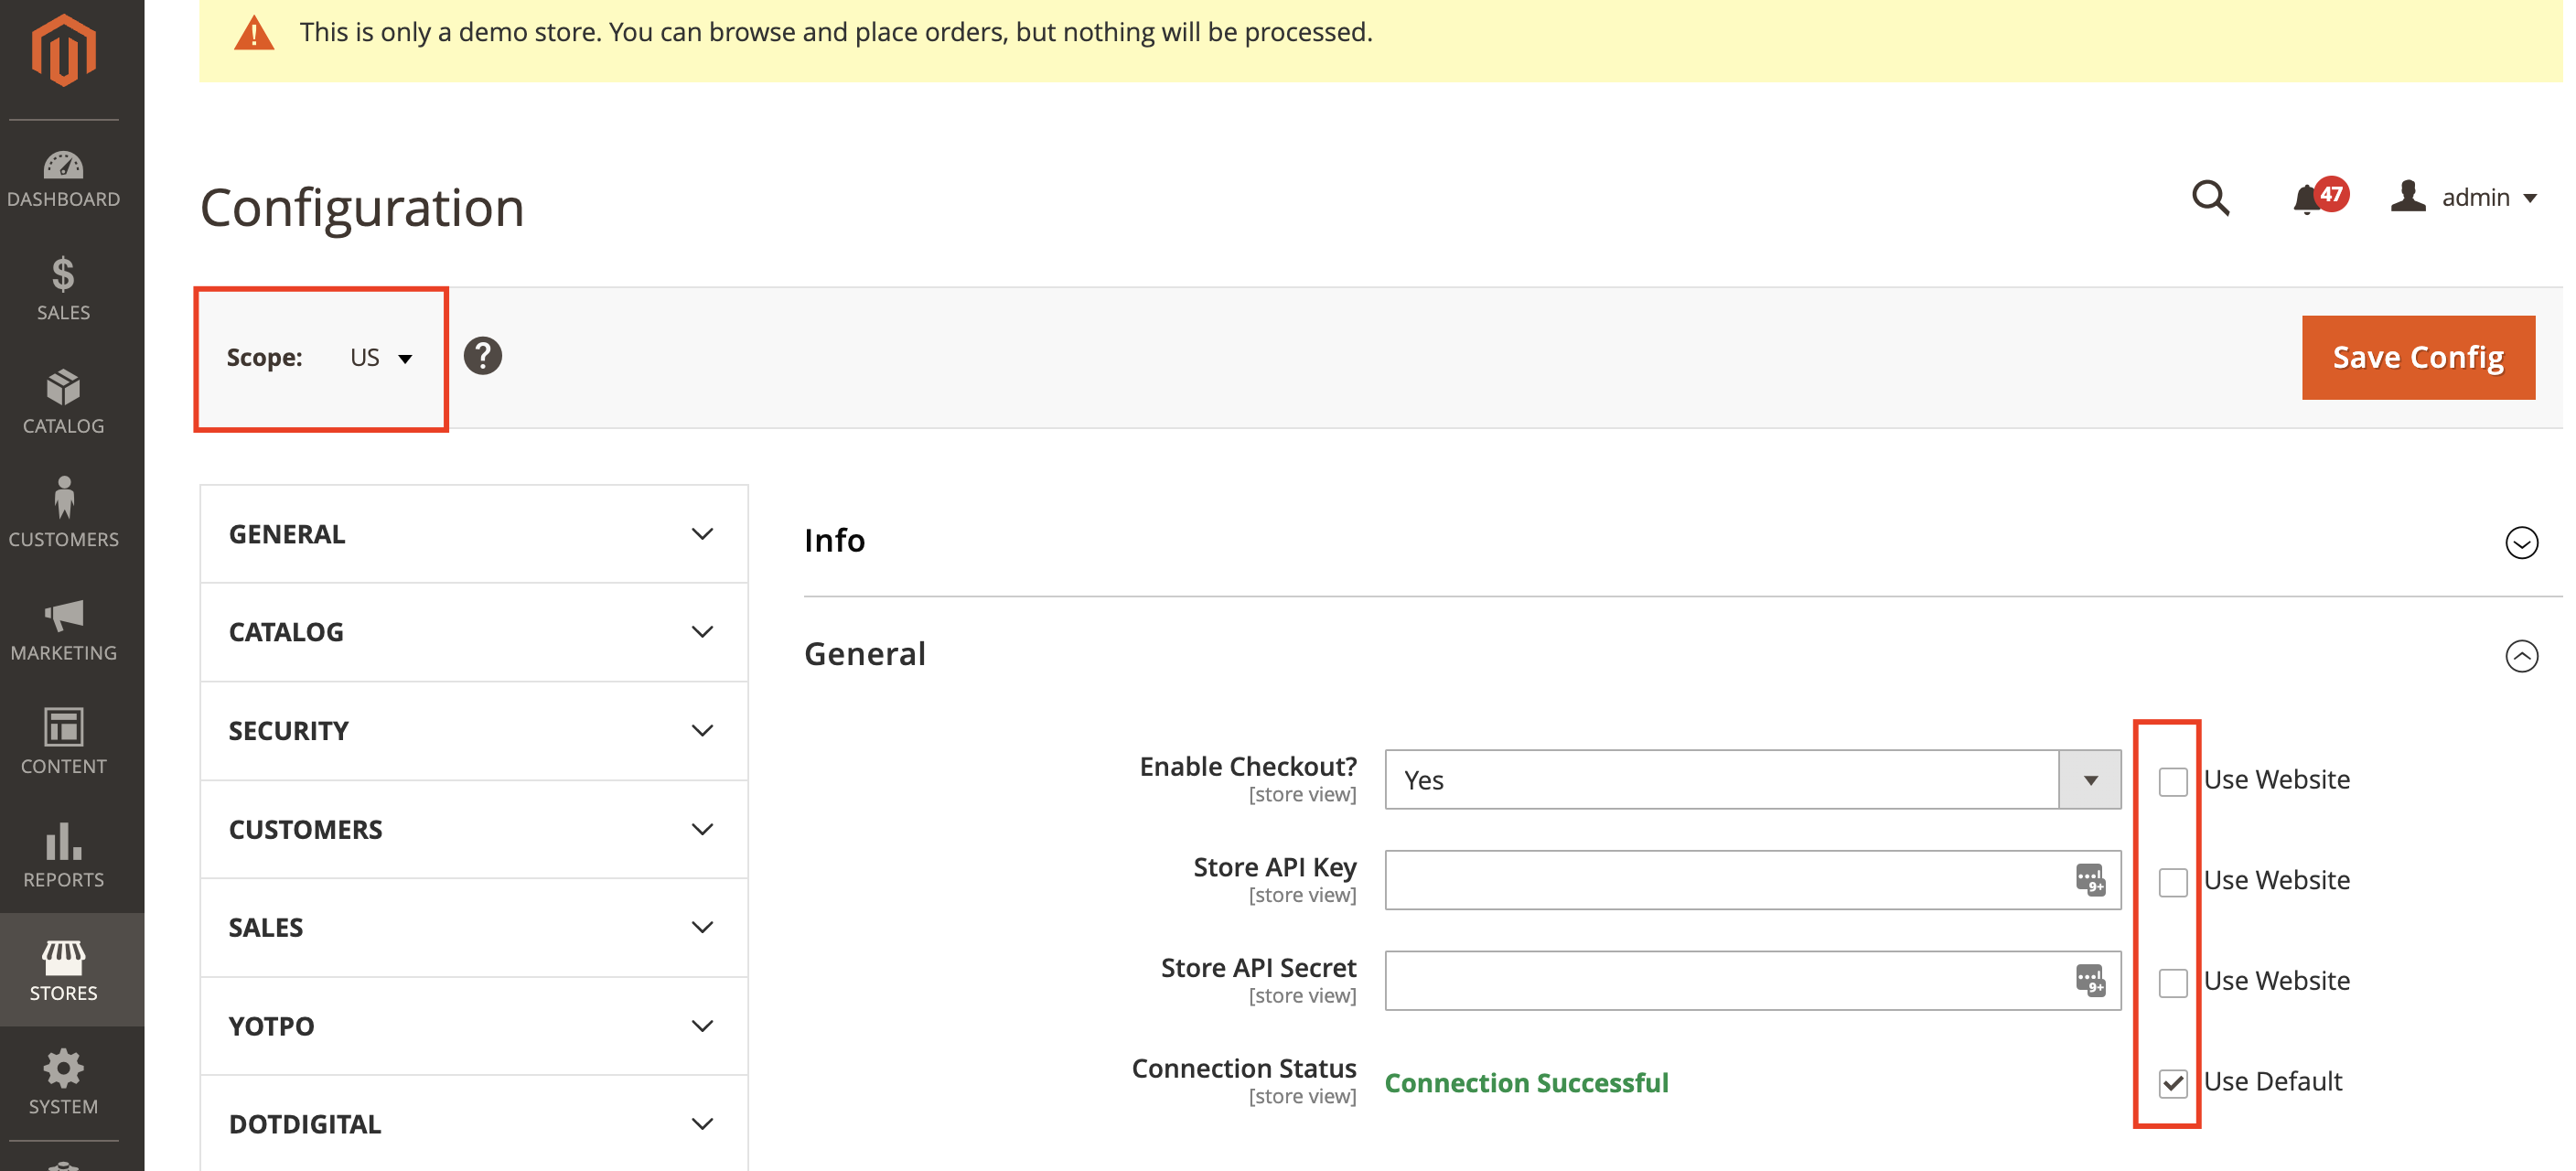
5. Go to your Magento Admin Panel > Stores > Settings > Configuration > Dominate > Dominate Checkout.
6. Change your Magento store scope, uncheck the "Use Webiste" option from the Enable, API Key and Store Secret options from the Dominate General section, and paste the credentials from the step 4
7. Repeat the process as needed.
